Агляд інтэрфейсу
Табліца ў DiMaker выкарыстоўваецца для стварэння файлаў па спісе з рознымі персанальнымі дадзенымі.
Акно табліцы выглядае наступным чынам:
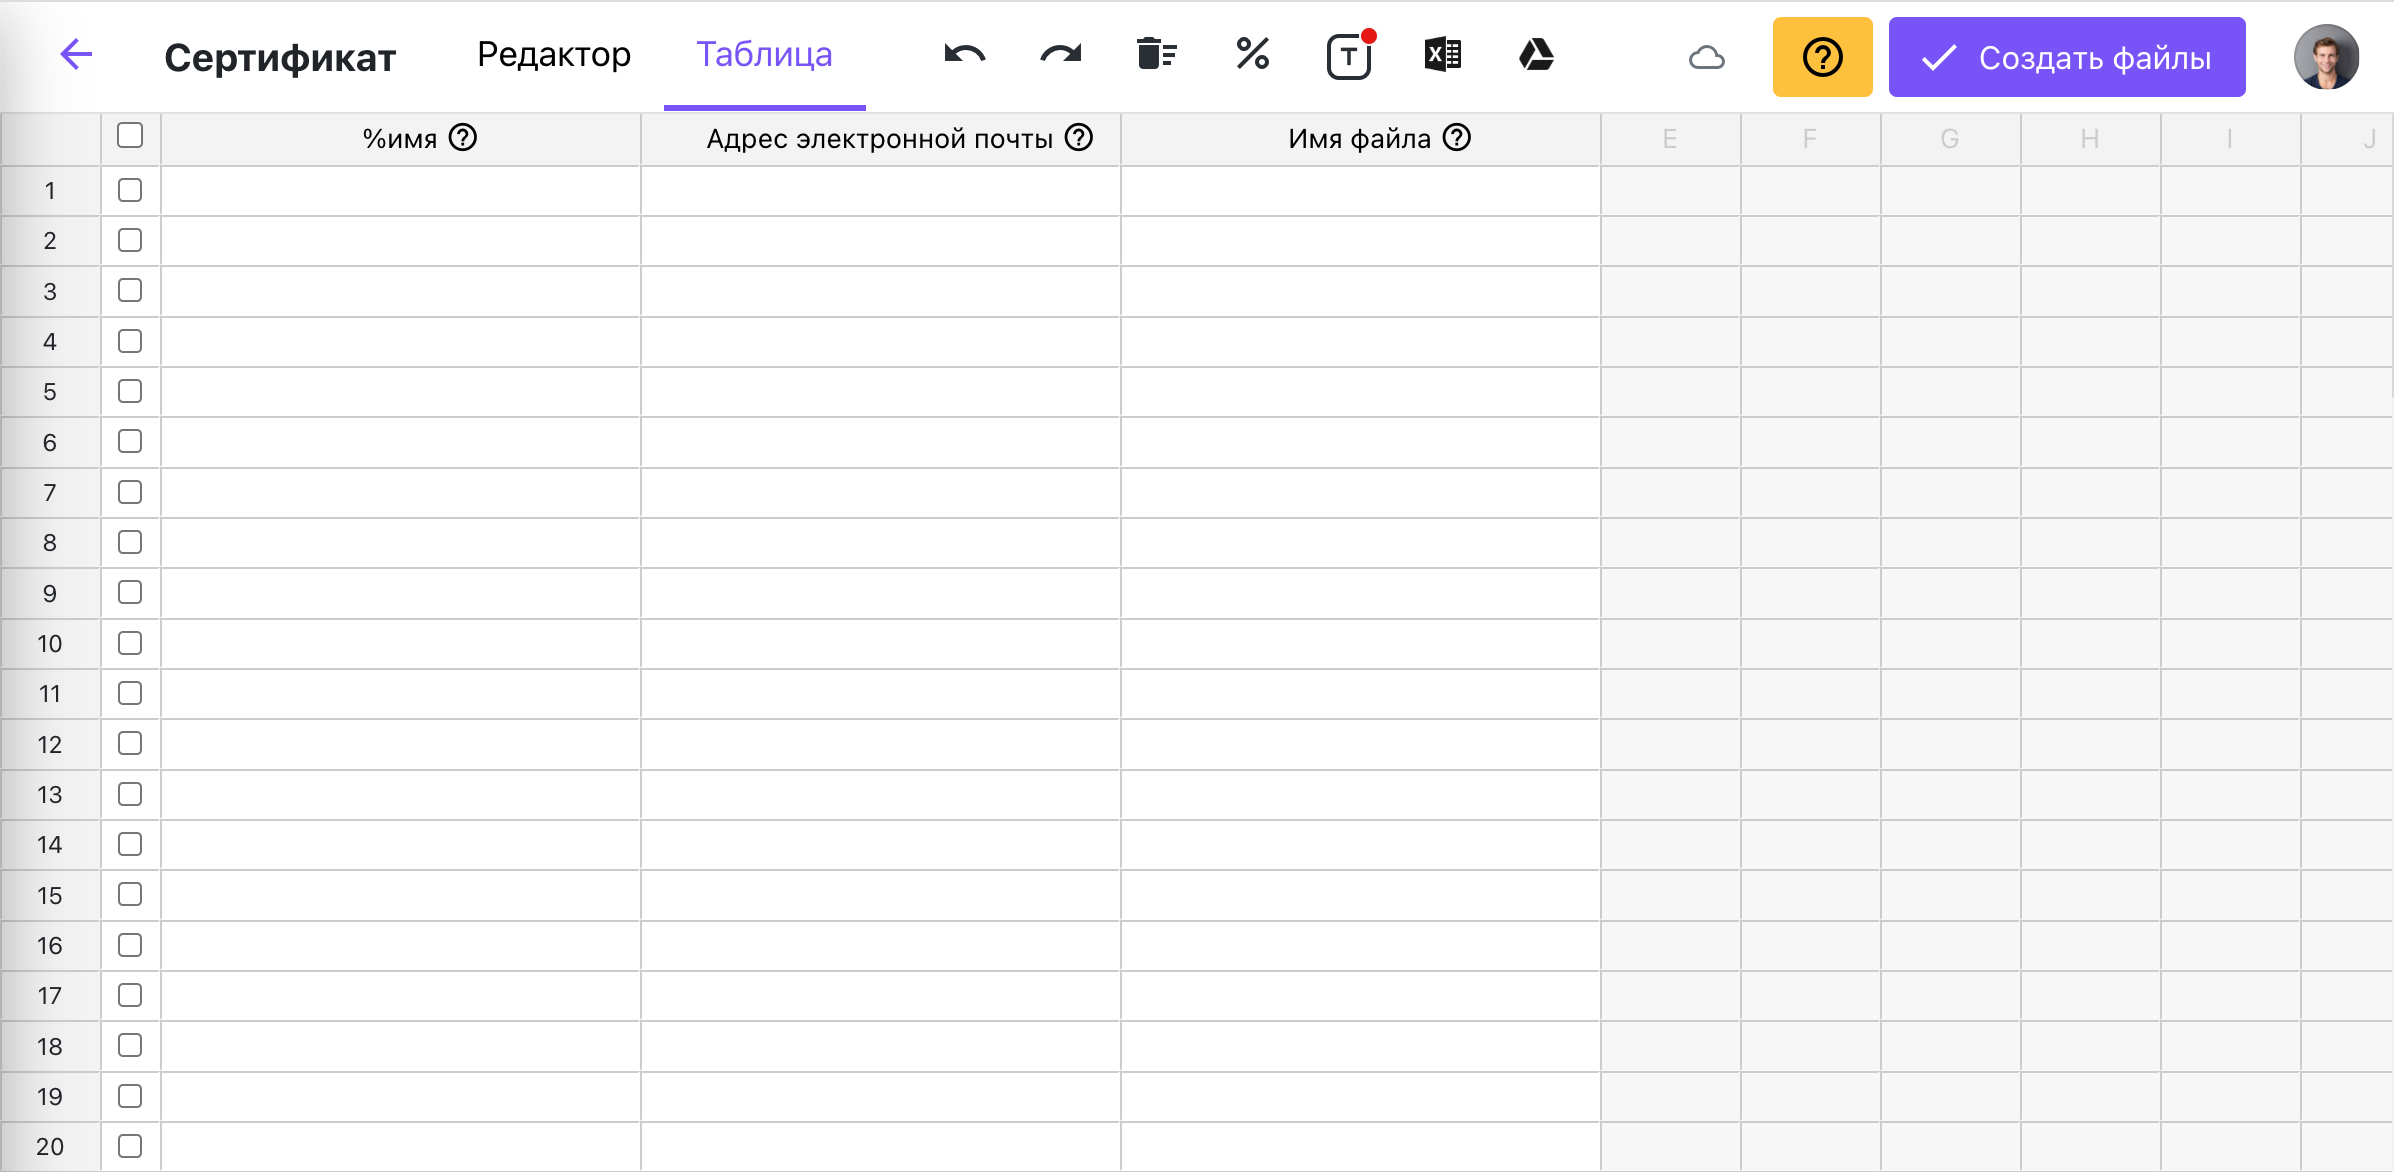 Табліца ў DiMaker
У верхняй частцы знаходзіцца панэль інструментаў:
- Кнопка назад - вяртанне ў Документы
- Ўкладкі пераключэння Табліцы і Рэдактара дазваляюць пераключацца паміж рэдактарам і табліцай у адным дакуменце. Калі створана асобная табліца, то ўкладкі не адлюстроўваюцца.
- Кнопкі «Адмяніць і паўтарыць» дазваляюць адмяняць і вяртаць кожнае дзеянне. Захаванне табліцы адбываецца аўтаматычна.
- Кнопка «Ачысціць табліцу» цалкам ачышчае табліцу і стварае ўсе калоны нанова.
- Кнопка «Выбраць пераменную» служыць для ўказання пераменнай для выбранай калоны.
- Кнопка «Апрацаваць праз Слоўнік» адкрывае акно Слоўнікавай формы.
- Загрузка дадзеных з Excel і Google Sheets дазваляе загружаць дадзеныя ў табліцу.
- Кнопка «Стварыць файлы» адкрывае акно «Стварыць файлы». Перад стварэннем файлаў трэба выбраць адну або некалькі радкоў, па якіх файлы будуць стварацца, актывуючы чекбокс у першай калоне кожнай табліцы. Толькі выбраныя радкі будуць выкарыстоўвацца для стварэння файлаў.
У цэнтральнай частцы - асноўная табліца.
У табліцы няма абмежавання на колькасць радкоў. Кожны радок табліцы - гэта будучы асобны файл. Пры стварэнні файла пераменныя, вызначаныя ў загалоўку, замяняюцца на дадзеныя, пазначаныя ў клетцы.
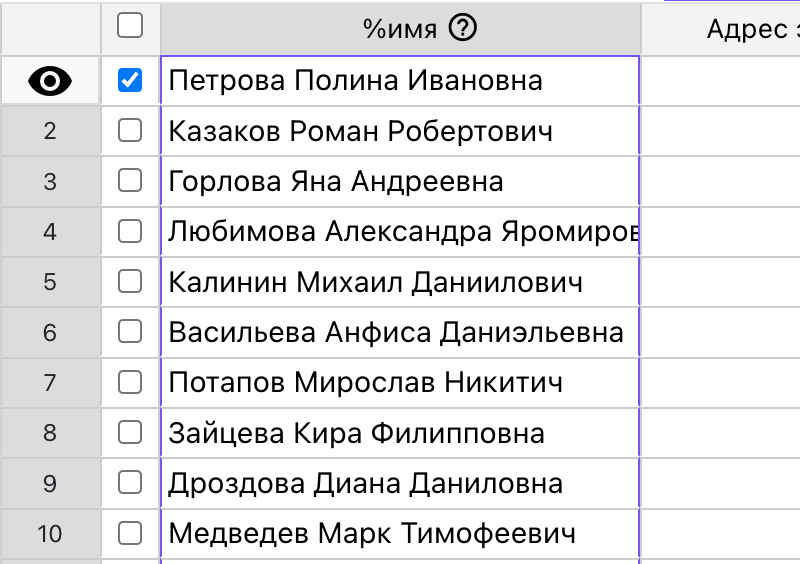
Каб паглядзець, як будзе выглядаць файл, дастаткова выбраць любы радок і націснуць на кнопку «Прадпрагляд» у загалоўку радка.
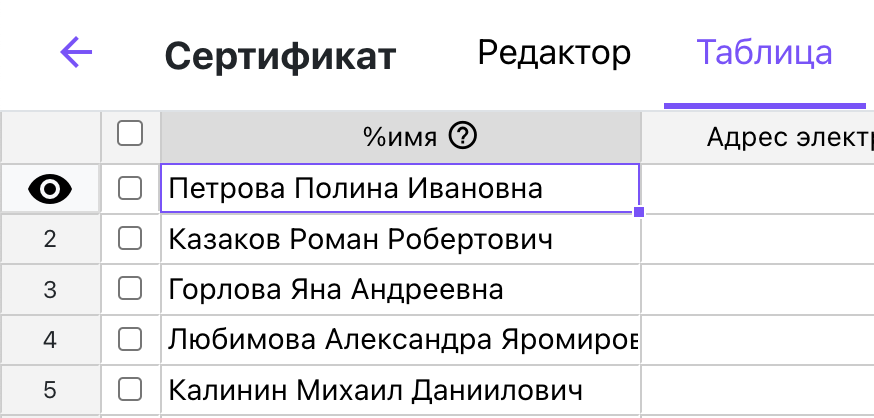 Кнопка прадпрагляду знаходзіцца злева
Для стварэння файлаў трэба актываваць чекбокс на кожнай радку, па якой трэба стварыць файлы. Калі націснуць на чекбокс у загалоўку калоны, то можна выбраць усе або зняць выбар з усіх. Выбіраюцца толькі тыя радкі, у якіх ёсць дадзеныя.
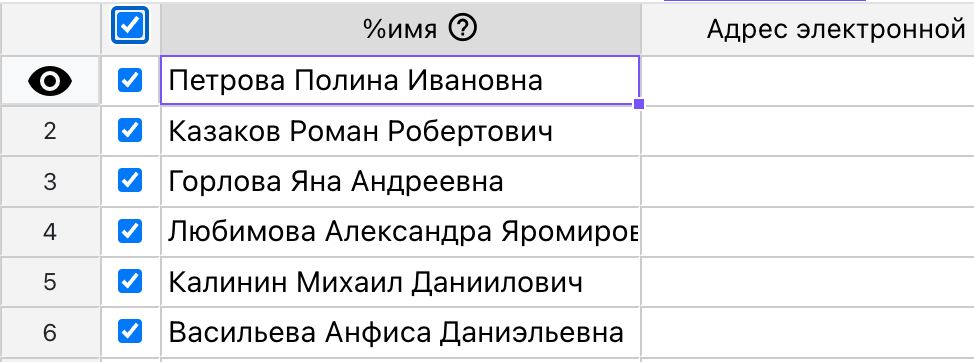 Чекбокс у загалоўку табліцы актывуе або дэактывуе чекбоксы на ўсіх радках
Кантэкстнае меню
Націск правай кнопкай мышы па калоне адкрывае кантэкстнае меню.
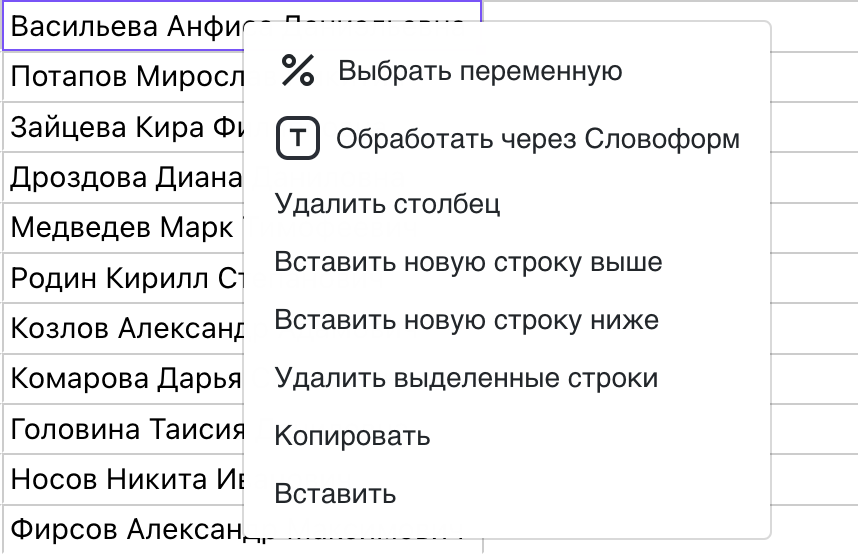 Кантэкстнае меню табліцы
Пункты «Выбраць пераменную», «Апрацаваць праз Слоўнік» і «Выдаліць калонку» прымяняюцца да ўсёй калоны.
Астатнія пункты прымяняюцца толькі да выбранага.
Каб вылучыць усю калонку, трэба клікнуць па загалоўку табліцы.
 Вылучэнне ўсёй калоны
Даданне радкоў
Дадаць адзін або некалькі радкоў можна праз кантэкстнае меню. Калі патрэбна дадаць многа радкоў, трэба пракруціць ліст у ніжнюю частку табліцы і там націснуць «Дадаць радкі», указаўшы колькасць. DiMaker можа працаваць з неабмежаванай колькасцю радкоў. Але пры больш чым 5 тысячах радкоў могуць узнікнуць затрымкі работы браузера.
Стварэнне файлаў
Файлы ствараюцца па кожным радку табліцы, у першай калоне якіх актываваны чекбокс. Пры стварэнні файла пераменныя, вызначаныя ў загалоўку, замяняюцца на дадзеныя, пазначаныя ў клетцы. Каб стварыць файлы, трэба націснуць кнопку «Стварыць файлы» на панэлі інструментаў, папярэдне выбраўшы ўсе або патрэбныя радкі. Пасля гэтага адкрыецца акно «Стварыць файлы».