Integração com Google Sheets
Configure a criação automática de arquivos ao modificar o Google Sheets. Os dados serão enviados ao DiMaker para geração dos arquivos. Se necessário, o status do envio e o link para o arquivo gerado podem ser retornados à planilha do Google.
Google Sheets
Crie uma planilha com dados pessoais. Você pode usar Google Forms ou quaisquer outros serviços de terceiros para alimentar a planilha. Os arquivos serão criados assim que a planilha for alterada. Para testes, adicione algumas linhas de exemplo. A primeira linha pode conter títulos ou pode ser uma planilha sem cabeçalhos.
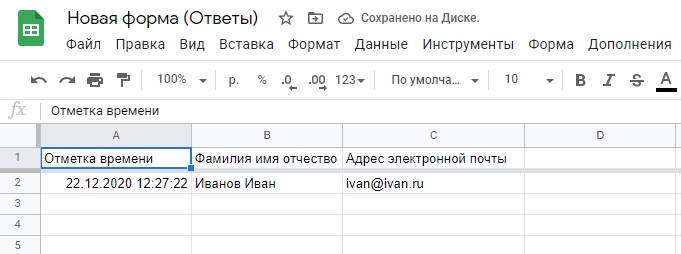 Google Sheets com dados para importação automática no DiMaker
Acima, um exemplo de Google Sheets com dados provenientes do Google Forms. A quantidade de linhas e colunas pode ser qualquer uma.
Documento no DiMaker
Crie um documento no DiMaker. Nos locais onde forem inseridos dados pessoais da planilha, escreva variáveis, como %name.
Quando tudo estiver pronto, volte para a planilha, clique em "Carregar a partir do Google Sheets" e, na janela que aparecer, selecione a aba "Importação Automática".
 Documento aberto com a variável %name no menu "Arquivo" - "Importação Automática".
Em seguida, na janela modal que aparecer, configure cuidadosamente os parâmetros de importação.
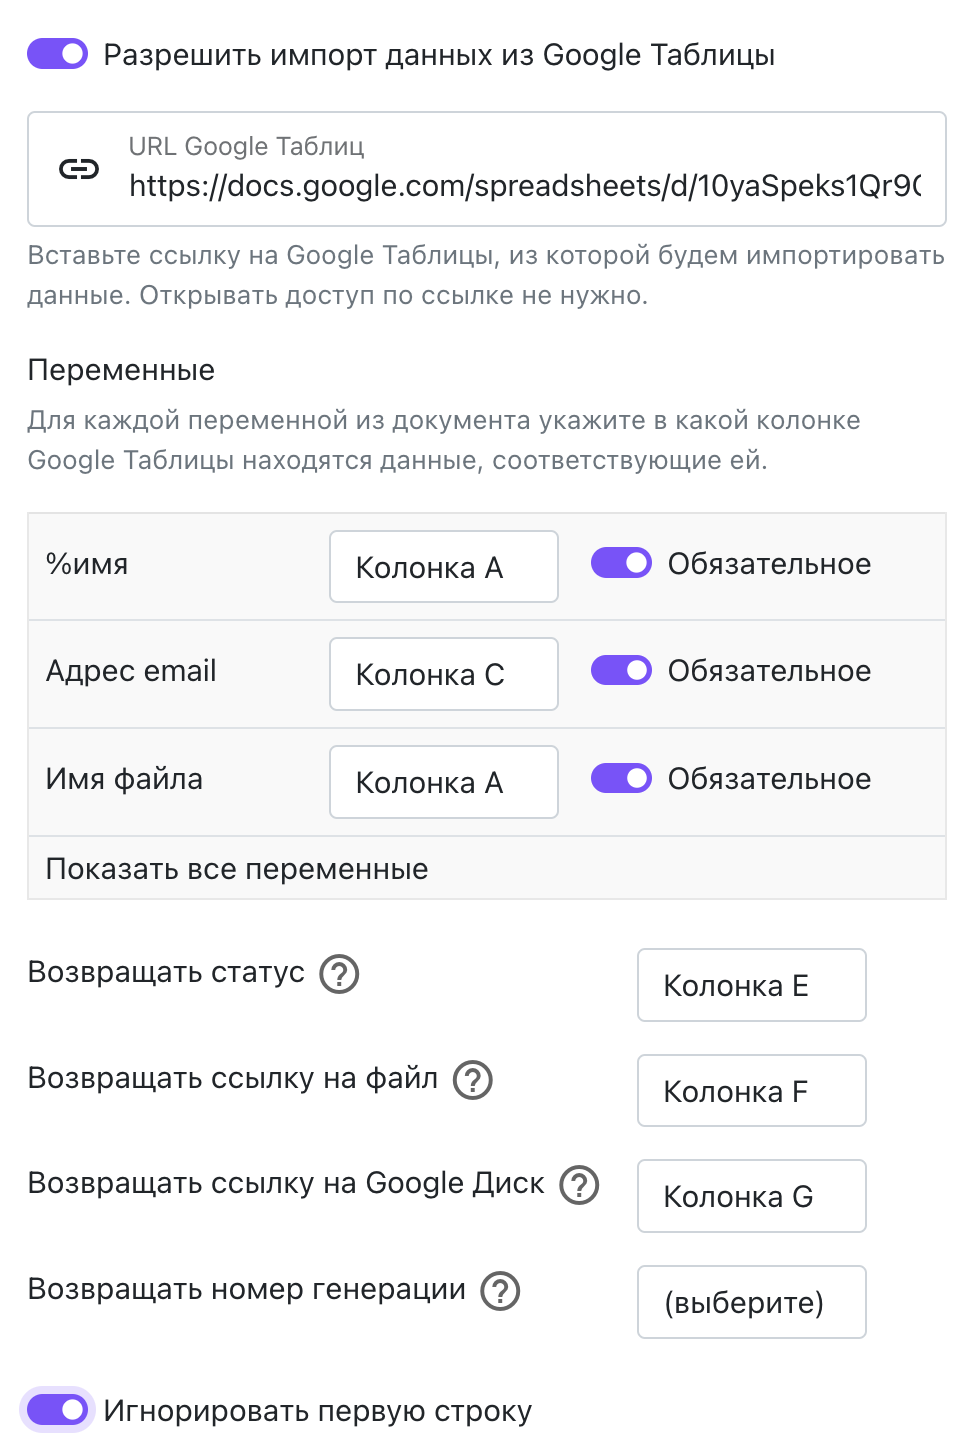 Janela de configurações para importação automática do Google Sheets
- URL do Google Sheets: Insira o link do Google Sheets copiado do navegador. Não é necessário habilitar "Acesso com Link".
- Variáveis: Indique em qual coluna do Google Sheets estão as variáveis usadas no documento. Se a opção "Obrigatório" estiver ativada, o arquivo não será criado até que a célula correspondente seja preenchida. Recomendamos ativar essa opção para todos os campos essenciais, como Nome ou Email.
- Retornar status: O status do envio do arquivo será exibido na coluna especificada. A coluna deve estar vazia e não deve conter dados duplicados. Os possíveis status são: "Criado", "Enviado", "Entregue", "Erro".
- Retornar link do arquivo: Na coluna especificada será inserido o link do arquivo gerado. A coluna deve estar vazia e não deve conter dados duplicados.
- Retornar link no Google Drive: Insira o link do arquivo gerado em sua conta do Google Drive. A sincronização com o Drive deve estar ativada, podendo levar um tempo até que o link apareça.
- Retornar número único: Um número exclusivo será inserido na coluna especificada, útil para identificar a geração de um arquivo específico. Certifique-se de que a coluna esteja vazia e não interfira em outras informações.
- Ignorar a primeira linha: Marque esta opção se sua planilha contém cabeçalhos na primeira linha, como no exemplo acima.
A configuração para criação dos arquivos deve ser ajustada em paralelo.
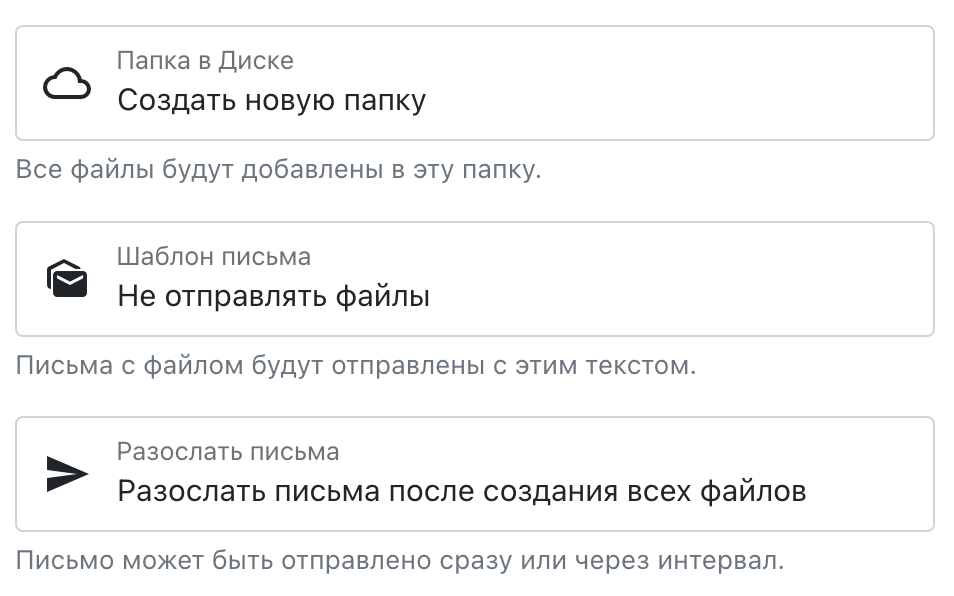 Janela de configuração para importação automática do Google Sheets
- Pasta no Drive: Defina o local onde os arquivos serão armazenados. Crie a pasta antecipadamente, por exemplo, usando o nome ou data do evento.
- Modelo de Email: Escolha o template de email para envio. Os templates estão localizados na seção "Emails" - "Modelos".
- Agendar envio: Configure o momento para enviar os emails. Recomendamos "Após a finalização de todos os arquivos".
Apps Script no Google Sheets
O último passo é adicionar o código de exportação e o disparador no Google Sheets. Para isso, volte à planilha que será utilizada para importar os dados e selecione "Extensões" - "Apps Script".
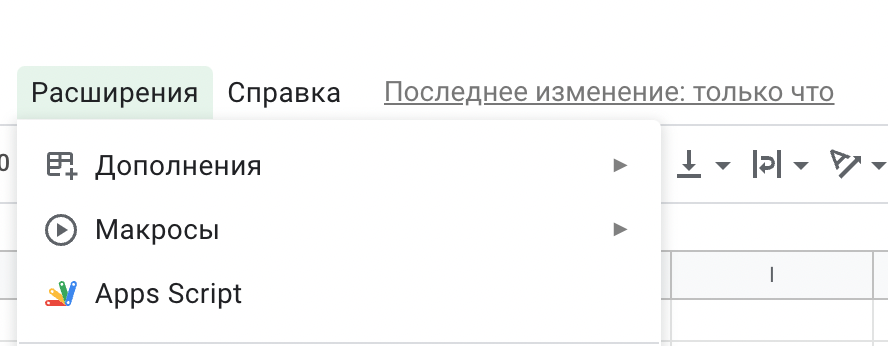 Janela do Google Sheets - menu "Extensões" - "Apps Script"
Na janela que abrir, insira o seguinte código:
Exibir código
Para que serve este código? Ele exporta dados da planilha em que foi inserido para o DiMaker, em formato , gerando arquivos e retornando links ou status para os campos especificados. O script não tem acesso a outros documentos ou ao Google Drive.
Copie o código no editor de scripts (substituindo o existente). Nomeie-o como preferir, por exemplo, DiMaker.
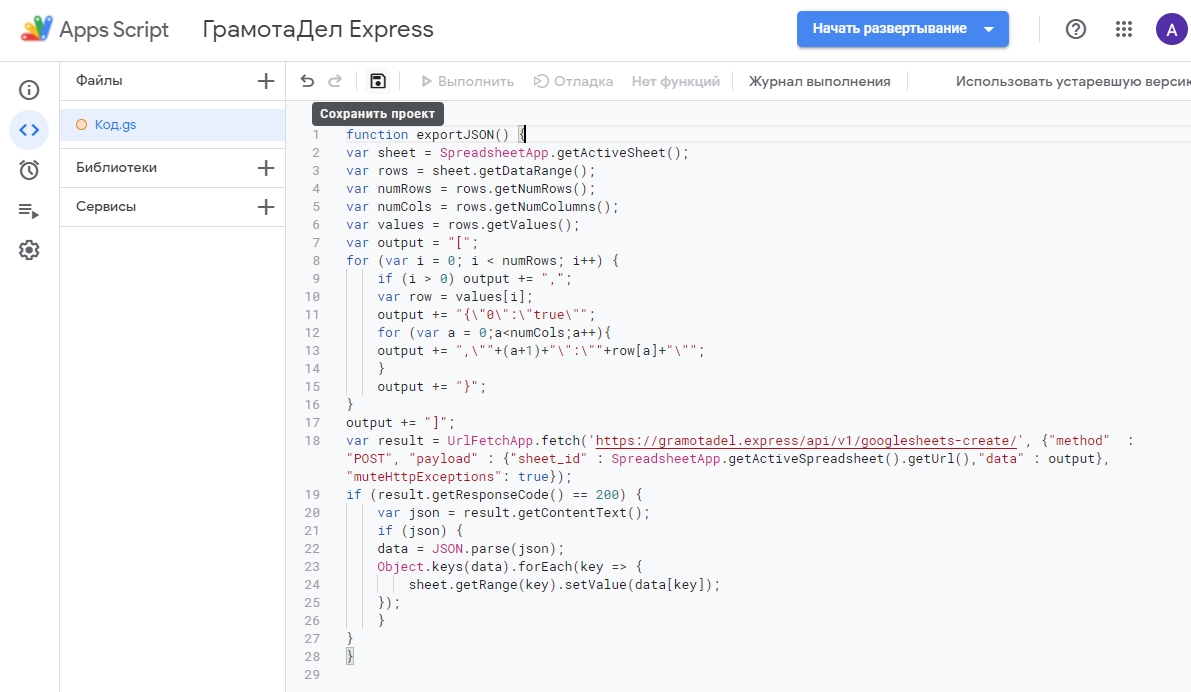 Janela do editor Google Apps Script
No menu superior, clique em "Salvar Projeto" e, em seguida, após salvar, clique em "Executar".
 Janela do editor Google Apps Script - botão "Executar"
Aparecerá uma janela solicitando permissões.
*Texto traduzido parcialmente devido à extensão. Entre em contato novamente para continuar ou ajustes no conteúdo.*